November
There are so many fun things to do for the month of November! It was difficult to choose what to include in the package of favorites. I hope that you will add these to your favorites for the month of November.
****Please note that these files are optimized for Adobe Reader version 7 or newer. You may be unable to print correctly if you have an older version of this program. This program is free at the following link.
![]()
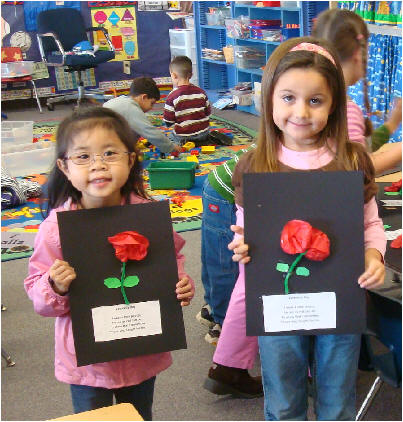
Veteran's Day
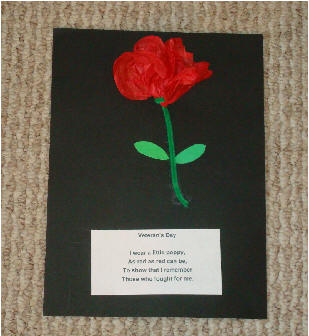
Materials:
9x12 black construction paper for background paper
6 inch green pipe cleaner or use green construction paper -- ½ x 6 inch.
 Click on the circle for the PDF file leaf pattern. Cut five, red
tissue paper circles. I have an adult cut these since tissue
paper is very difficult for the children to handle.
Click on the circle for the PDF file leaf pattern. Cut five, red
tissue paper circles. I have an adult cut these since tissue
paper is very difficult for the children to handle.
 Poppy
Leaf Pattern
Poppy
Leaf Pattern
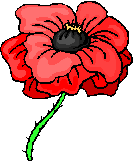 Click on the poppy for the PDF file Poem
Directions:
1. Use white crayon to put name on back of the black construction paper.
2 Cut out poem and glue to the bottom of the paper.
3. Take three pieces of red tissue paper and put together in a stack. Fold the red tissue paper in half to find the middle. Use the pipe cleaner to twist around the middle. This is a bit difficult for the children, but the flowers all turn out fine---each one is different!
4. Put white glue on the back of the poppy and the stem to glue above the poem.
Fall Trees
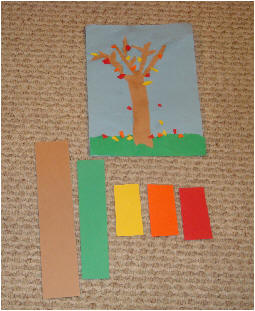
Materials needed:
9x12 blue construction paper
8 ½ x 2 ½ inch brown construction paper for tree trunk
5x3 inch brown construction paper for tree branches
9x2 inch green construction paper
2x4 inch red, yellow and orange construction paper to tear leaves. You can also use brown for leaves.
Falling Leaves poem
white glue
scissors
PDF File for "Falling Leaves" poem

Directions:
1. Glue one copy of
the "Falling Leaves" poem on one side of the blue paper (back) and put
name. ***Optional --Children can 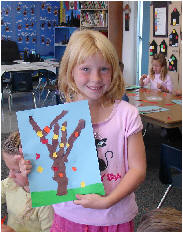 color
the leaves that are printed at the bottom of the poem.
color
the leaves that are printed at the bottom of the poem.
2. Tear one long side of the green construction paper for the grass. I tell the children to use their fingers like scissors. It is a bit difficult for them to tear, and many of them would rather cut the paper with scissors. I remind them that it builds their small muscles in their hands! :) Put one dot of white glue on each end of the grass and one or two dots in the middle and glue to the bottom of the blue paper.
*** Hint--I use the plastic lids from Cool Whip or butter containers for glue. I put a "blob" of glue for 2 or 3 children to share. The glue will dry and you can peel off the glue---NO WASHING!
3. Tear all sides of the brown construction paper for the tree trunk. Put glue at top, middle and bottom of the tree trunk and place on top of the grass.
4. Use the 5x3 piece of brown construction paper to tear into strips for the branches. All sides should be torn! Glue branches on tree.
5. I give each child a piece of 2x4 inch red, orange and yellow construction paper to tear into tiny pieces for the leaves. I have them tear all of the colors and then glue pieces on the tree, under the tree and falling!
Scarecrow Project
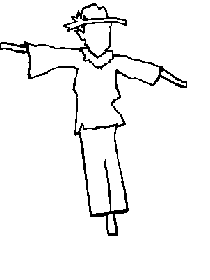 This is
a fun, family project that I usually do in late October or early
November. I have also included a letter
to the parents giving a few ideas to explain the project. You
might like to use it, too! You can add the date you would like
to have the project returned to school.
This is
a fun, family project that I usually do in late October or early
November. I have also included a letter
to the parents giving a few ideas to explain the project. You
might like to use it, too! You can add the date you would like
to have the project returned to school.
Parent Letter And Scarecrow Pattern PDF file. The scarecrow pattern is a 8 ½ x 14 inches. I use heavy paper such as cardstock to make it sturdy. It can also be mounted on cardboard by parents.

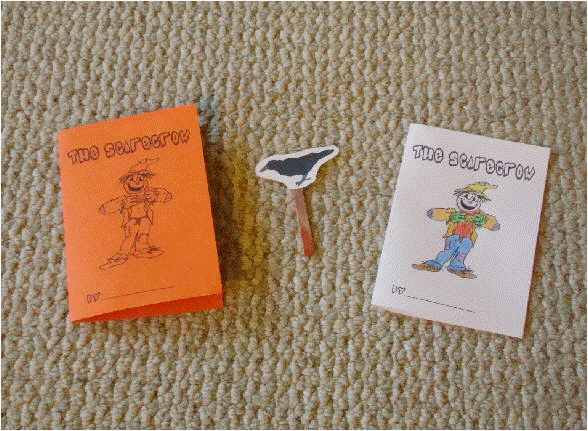 This
is one of everyone's all time favorite student made books. It's
a great book for teaching color words and tracking words in learning
to read. Each page
has one part of the scarecrow colored making it very simple and easy
for the children to "read." (see second picture for sample page)
The kids love using the crow pointer that was made using a popsicle
stick to track the words!
This
is one of everyone's all time favorite student made books. It's
a great book for teaching color words and tracking words in learning
to read. Each page
has one part of the scarecrow colored making it very simple and easy
for the children to "read." (see second picture for sample page)
The kids love using the crow pointer that was made using a popsicle
stick to track the words!
There are two different books shown in the photo above. You can copy the cover on a colored paper or use white construction paper if you would like for the students to color the scarecrow on the outside cover. We colored the cover after all of the book was completed to see if the students could remember (no peeking!) what color all of the parts of the scarecrow were supposed to be. Great for recall, too!
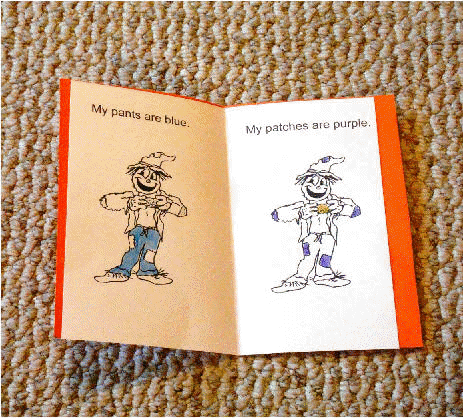
This is a project that is probably best suited in a small group. You will need to monitor the children closely to see that each page is colored correctly. We stress before starting that ONLY one thing is colored on each of the pages. This makes it very easy for the students to track and "READ!" The sample below shows ONLY the red shirt colored in order for the student to read: My shirt is red. All of the pages are completed in the same way. I cut out the crows and glue them on a popsicle stick ahead of group time. Another idea is to staple the crow on a piece of string or yarn. Then staple the string inside the book to prevent it from getting lost.
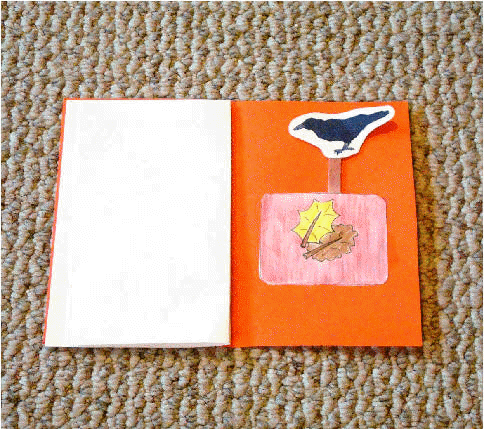 This
page is optional. I use it for a pocket to put the Crow
Pointer inside.
This
page is optional. I use it for a pocket to put the Crow
Pointer inside.
I Like Fall Book

Copy the three pages and collate the nine pages of the student books. We completed these books in a center in order to make sure each page is colored correctly. I also used sentence strips for each of the sentences and used the leaf to reinforce the color words and high frequency words " I like ______."
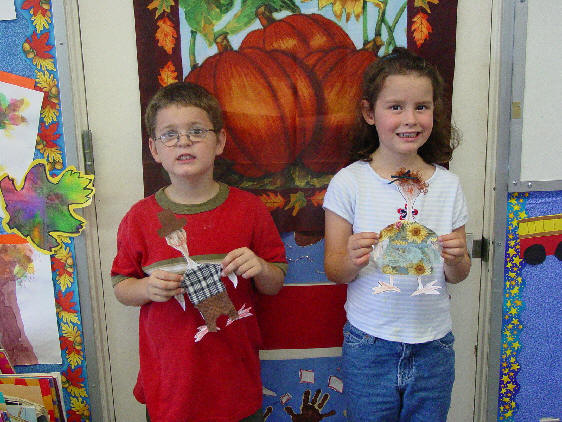
3-D I Am Thankful Turkeys
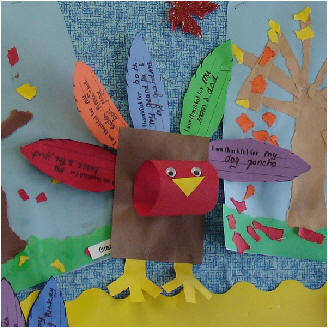
Materials needed:
1- 4x5 brown construction paper for turkey body
1- 2 ½ x red construction paper for turkey head
Yellow or orange feet using PDF file pattern.
Colored feathers using PDF file pattern.
Yellow or orange beak using PDF file pattern.
white glue
3/8" squiggle eyes (purchased at craft store)
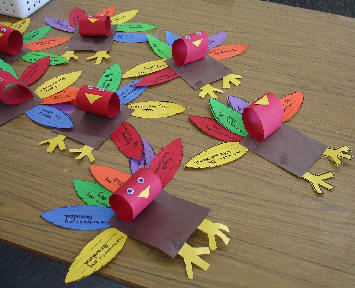
Directions:
1. Roll the red paper to make the head for the turkey and glue to the top of the brown construction paper body. Cut out and glue beak and squiggle eyes on the front of the turkey's face.
2. Turkey feet are cut out and attached to the back of the turkey.
3. Children may dictate or write what they are thankful for on the feathers.
4. Attach feathers to the back of the turkey.
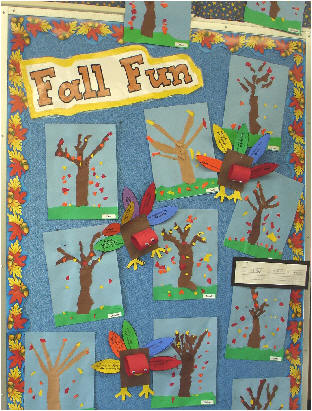
 "Fall Fun"
Banner PDF file This banner will print in three sections.
You will need to trim and tape the sections together. I mounted
the banner on yellow background construction paper and cut a bubble
around the letters of the banner. You may mount this on a
colored piece of construction paper and then laminate. The
banner will last for many years if laminated!
"Fall Fun"
Banner PDF file This banner will print in three sections.
You will need to trim and tape the sections together. I mounted
the banner on yellow background construction paper and cut a bubble
around the letters of the banner. You may mount this on a
colored piece of construction paper and then laminate. The
banner will last for many years if laminated!
Mayflower Writing
This is a fun writing activity that can be used for a bulletin board, or you can put all of the stories together for a class book. We spend time discussing what kinds of things the Pilgrims brought with them on the Mayflower and the hardships they had while coming to America. Then we talk about how crowded it was on the Mayflower. They were only able to take a very few things from home. We discuss what we would take with us if we were limited in what we could bring.
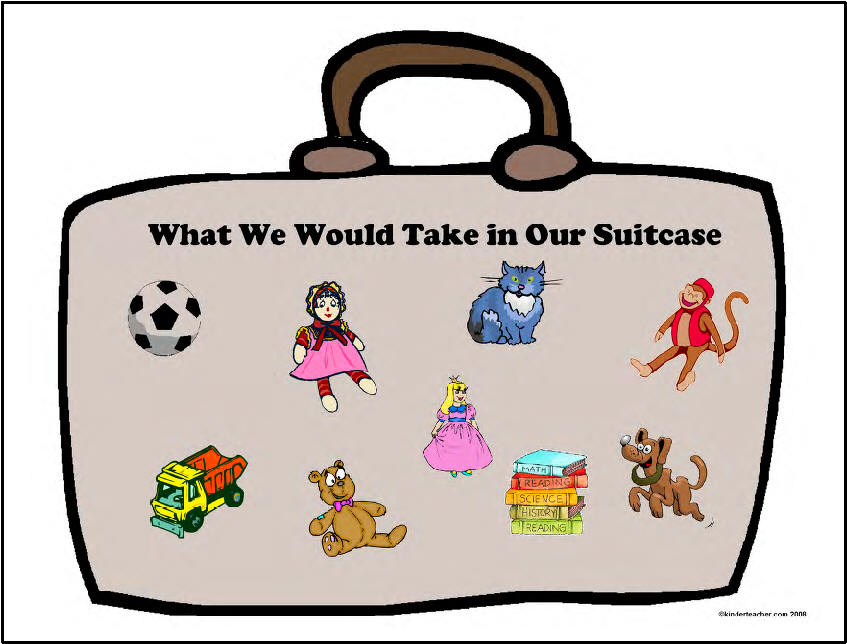

Mayflower Suitcase Writing PDF file
November Math Sorting Worksheet

This is a great way to teach or assess students in sorting skills. Students cut and paste objects in the circles.
November Math Counting
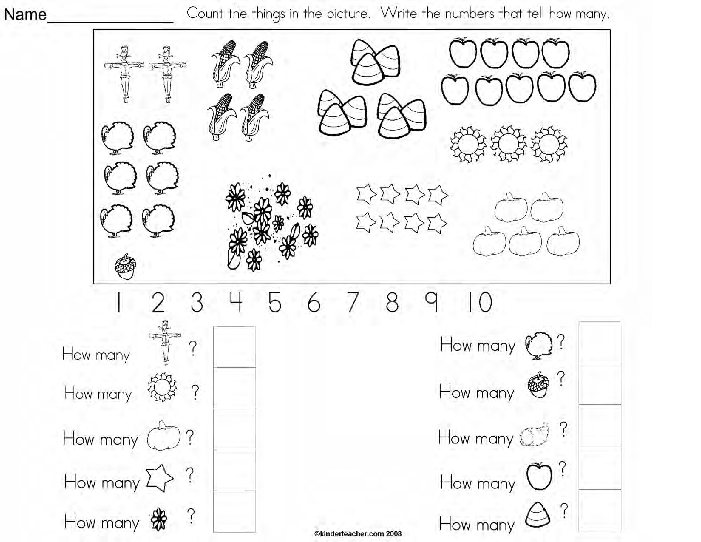
You may use this for extra practice in class or as an assessment in identifying and writing numbers.
When You Meet a Turkey
Student Book
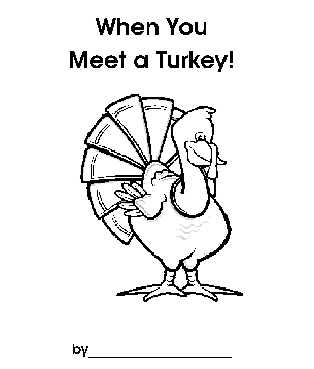
PDF file for "When You Meet a Turkey"
Copy both pages of the book and collate into student books.
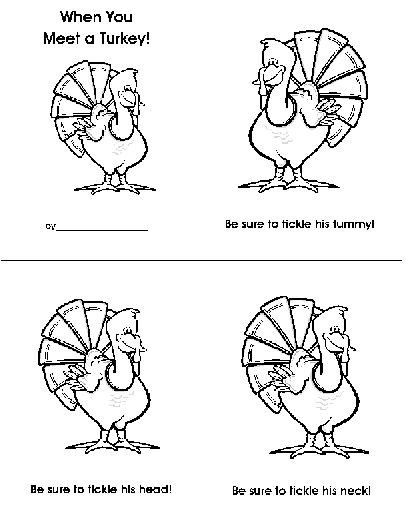 Each page is colored
with only the part of the body that is mentioned on that page.
For example, "Be sure to tickle his tummy!" The children only
color the turkey's tummy. This makes it very easy for them to
read their own book to all. I usually put the sentences on
strips and use the pocket chart to teach the story. You can make a copy
of the book and add the turkey to your sentence strips, too! The
kids love to use the pointer and read the story.
Each page is colored
with only the part of the body that is mentioned on that page.
For example, "Be sure to tickle his tummy!" The children only
color the turkey's tummy. This makes it very easy for them to
read their own book to all. I usually put the sentences on
strips and use the pocket chart to teach the story. You can make a copy
of the book and add the turkey to your sentence strips, too! The
kids love to use the pointer and read the story.
The Thanksgiving Story
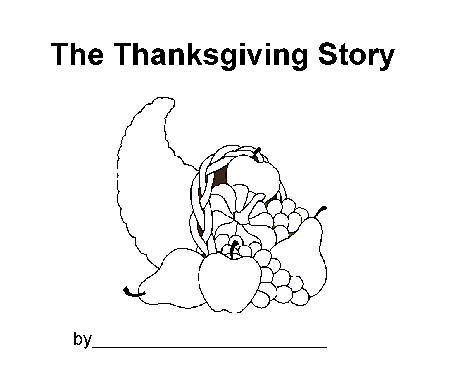
Cut pages in half and collate into booklets for students to read and illustrate. Sentences can be put on sentence strips for pocket chart and read aloud with students.
Turkey Time Quilt
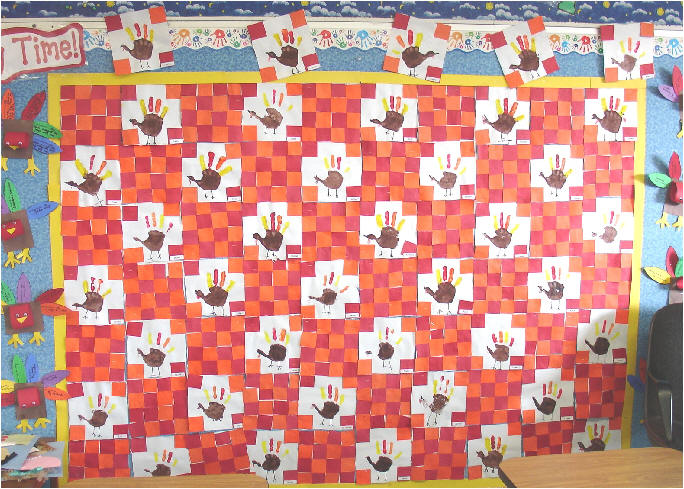
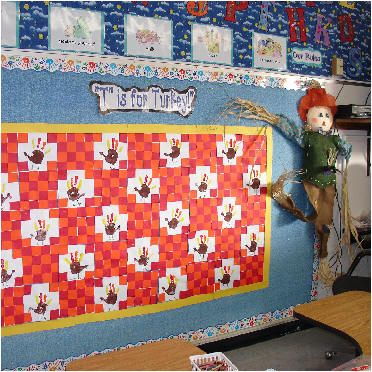
Two quilts from different school years are shown as samples.
Materials:
One Quilt Block Turkey to stamp hands PDF file pattern copied on White construction paper.
One Quilt Block Turkey (Square) PDF file copied on white construction paper.
10 - 2 inch orange squares for each block
10- 2 inch red squares for each block
Directions:
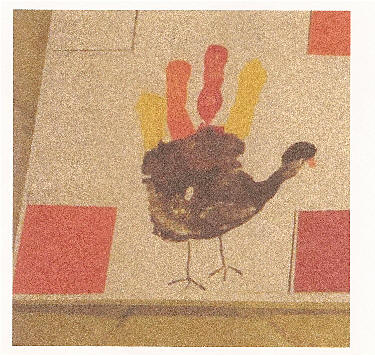 1.
I apologize for the poor quality of the sample. But, I think you
can get a better idea of how to stamp each hand using brown, yellow,
orange and red paint. You might choose to trace each hand and
use crayon to color the turkeys.
1.
I apologize for the poor quality of the sample. But, I think you
can get a better idea of how to stamp each hand using brown, yellow,
orange and red paint. You might choose to trace each hand and
use crayon to color the turkeys.
2. Use two red and two orange squares of construction paper to glue in each corner of the turkey square. We talk about diagonal and having the two orange squares diagonally across from each other. Red squares are glued in the other diagonal squares. Add beak, eye, wattle, and feet with crayon after the paint dries. I use plastic butter container lids for two or three students to share the glue. You can let the glue dry and peel off the glue--no washing!
3. The second block of the quilt is a checkerboard pattern or ABABAB. This is a great time to teach patterning, too. Lines are shown on the white paper to help the children line up the squares. I stress keeping the squares straight to make each row even. Use white glue to attach small squares to the quilt block. My rule for using glue is --A DOT IS A LOT!
Hints for how to put the quilt together:
After the children finish the checker board quilt block, I cut each of the blocks on the outside line on the paper cutter. I use a yard stick and decide how far down from the top of the bulletin board I want the quilt to start. You might want to allow space for a border. You can use a plain 2 ½ inch construction paper border or use a purchased border. Make a light pencil mark across the bulletin board to keep the quilt blocks straight. Blocks are stapled using one turkey block and one checkerboard block -- alternating across the bulletin board. Both of the sample quilts shown above were completed with approximately 40 students (2 classes.) If you have extra squares, you can attach them around the outside of the quilt. One year we used the big scarecrow that was purchased at Michael's.
Turkey Faces!
Click for the Turkey Body PDF file.
Materials:
White construction paper copy of the turkey body
Watercolors --- Liquid watercolor works great on this project. It is available at School Discount Supply. I haven't been able to find it at any of the local craft or art stores in my area.
Directions:
1. Children use water color to paint their turkey's body.
2. Take photos of each child and crop to about 1 ½ inches. I have an adult attach the photographs to the front of the turkey to make the turkey face! I suggest using rubber cement to avoid having ink run on the photograph.
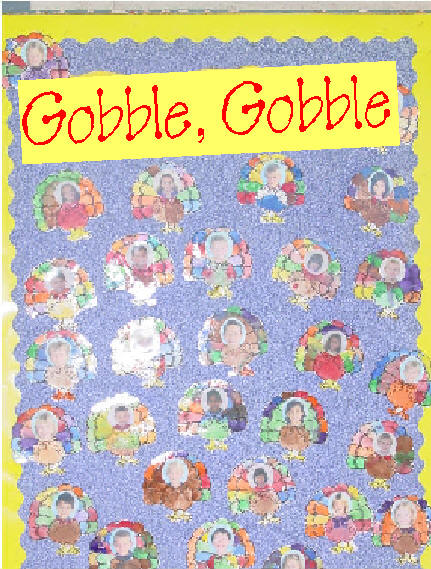
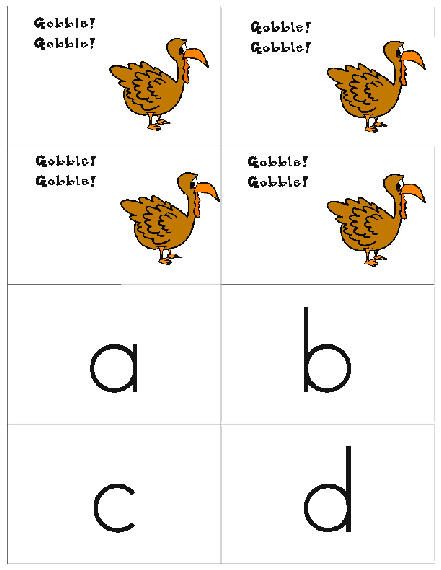
Gobble, Gobble Reading Game
PDF Files for Gobble, Gobble Reading Game
 I use cardstock to copy the cards. You can also use
construction paper. The cards can also be laminated and used
over and over.
I use cardstock to copy the cards. You can also use
construction paper. The cards can also be laminated and used
over and over.
***You might need to copy more sets of cards if you are playing with more than two or three students.
Rules of the game:
|
"Gobble, Gobble" is a card game that can be played with as many as six or seven children. Or, it can be played with only two. You can play the game for alphabet letter identification or for letter sounds. I copy the cards on cardstock (heavy) paper, but you could use construction paper, too. There are four pages of cards with extra Gobble cards. You might not want to use all of the Gobble cards. You also might need more alphabet letter cards if playing with more than two or three students. The dealer (adult) flashes a card from the top of the deck to the student. If the student can identify the letter, he/she gets to keep the card. If he/she cannot identify the letter or sound, the next player tries. The game continues with each player. When a player receives a "Gobble" card, he/she loses his cards to the dealer! Even though the player loses his/her cards, he or she can continue playing --- the player has to start collecting cards again. The person who has the most cards in their hand at the end of the game is the winner! The game continues around and around. You can put a time limit on the game using a timer. We usually set a time at the end of the center, etc. The children absolutely LOVE this game and beg to play it over and over again!
Gobble, Gobble Math Game
"Gobble, Gobble" is number game is played with the same rules as above, but it is used to practice number identification. Number cards from 1-30 are included.
I use cardstock to copy the cards. You can also use
construction paper. The cards can also be laminated and used
over and over. ***You might need to copy more sets of cards if you are playing with more than two or three students. |
Thanksgiving Day Card
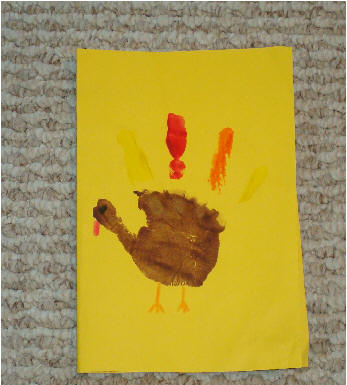
Materials
9x12 fall colored construction paper or black
Fall colors tempera paint
Crayons
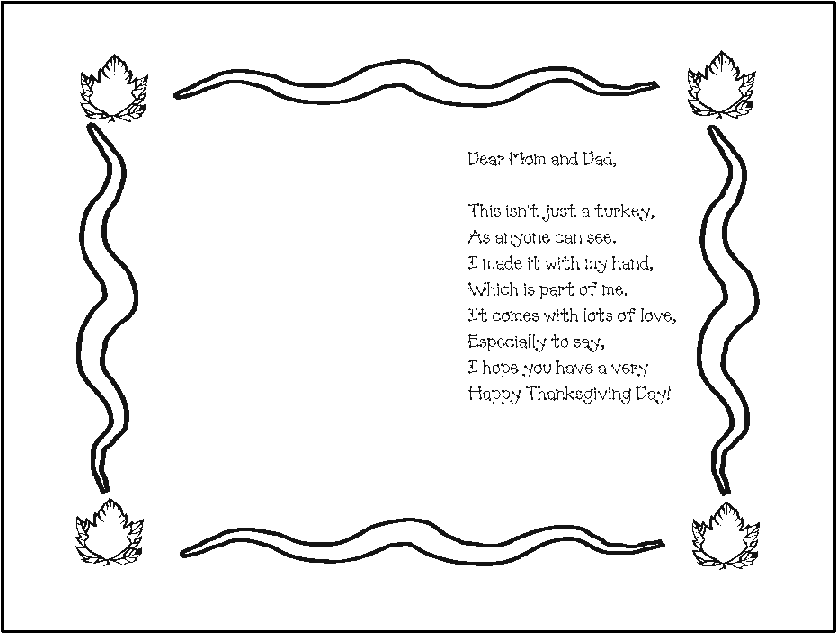
Poem PDF file (click for Thanksgiving Day poem)
Directions:
1. Each child's had is painted and stamped on the right side of a 9x12 piece of construction paper. The yellow paint is a bit hard to see on the yellow construction paper. It might look better on a different colored background paper. The palm and the thumb is painted brown and the fingers are painted in fall colors. The turkey's legs, eye and gobbler are added with crayon after the paint has dried.
2. The poem is copied on regular copy paper and glued inside the card. Children decorate the inside poem border. The name is signed under the poem and a picture can be added to the left side of the paper.
*** To save time---I always stamped an extra one or two extra of these for each child's memory book and the turkey quilt. It's much faster to stamp several handprints at once than re-paint each hand three times!
Dressed Turkeys
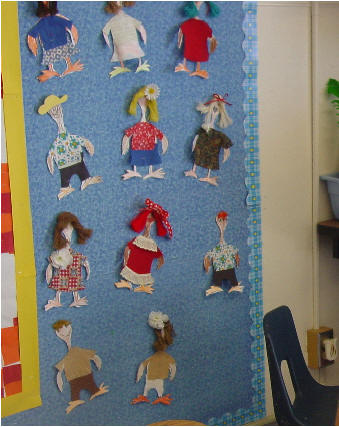

Click for Turkey Dress Patterns PDF file.
Materials needed:
Cardstock or heavy paper for turkey body
Fabric, wallpaper and construction paper can be used for clothes.
Crayons
***optional hair using yarn, or purchased doll hair
Directions:
1. Copy turkey body on card stock paper for extra strength. ***Adult may need to cut out the turkey.
2. Copy clothes and hat on colored construction paper, wallpaper or fabric.
3. Children color arms, legs, feet and add face for turkey.
4. Glue clothing, hat, or hair on turkey.
5. Name on back
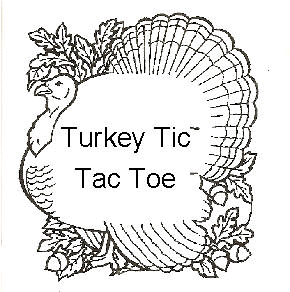
Everyone loves playing Tic Tac Toe. These cards can be printed and used in a center or as an independent free choice activity.
 November Bingo
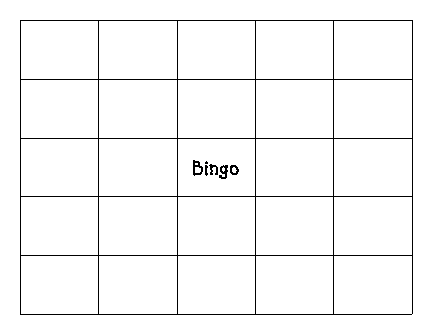
Children color and cut out the pictures and glue them on the grid. The pictures are glued on randomly where they would like to place them. This makes all of the cards different and not everyone winning at the same time.
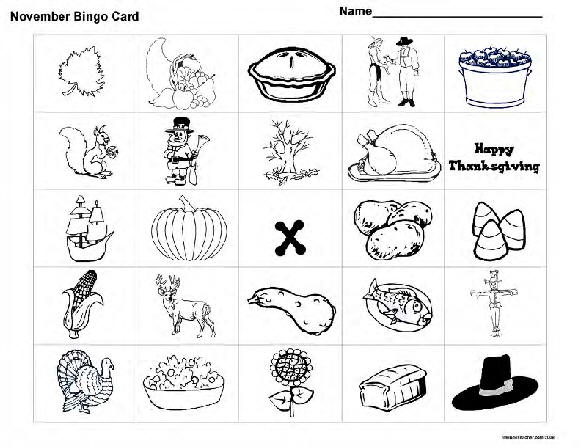
I use one of the picture cards to cut up and put in a box to use in calling during the game. You can also have one of the children be the "caller." Great way to build vocabulary!
Thank you again for purchasing the November Ideas package. I hope that you and your students enjoy using the activities. If you have any questions, please let me know.

![]()